Systems4PT’s Guide to Patient Billing and Collections
Part Six: Invoicing Patients
Unfortunately, no matter how hard you try to collect all fees at the time of service, you will have patient accounts that require sending an invoice. Invoicing patients is done by selecting “New Invoice” from the Corporate Reports Menu. “Invoice” on the Corporate Reports Menu is a more detailed statement and is usually only necessary for legal cases and by request from patients for their HSAs or taxes.
New Invoice
You should be invoicing patients with outstanding balances, at least monthly. If your front desk has been actively and efficiently checking in patients and collecting the money that shows on the Patient Processing Screen, both Co-Pay and Self-Pay sides, the patients needing to be billed should be very manageable.
You are going to utilize the Self-Pay Balances and Self-Pay Aging Reports to determine who needs to be billed. Always remember to run these reports to the most current date to be sure you catch all recent payments. You should cross-reference the accounts you are going to bill with the Patient Account Detail (PAD) under your FOCUS menu.
From the home screen in Systems4PT, select Corporate Reports and then New Invoices. The default setting for this report is to create an invoice for every patient that has a current balance. You can select other filters depending on your purpose. To generate an invoice for one patient, you can enter their account number or last name. If you have a large number of invoices and only want to print a few at a time, you can limit the “Account Number Range”. While working on your refunds, you can select “yes” to include Credit Balance.
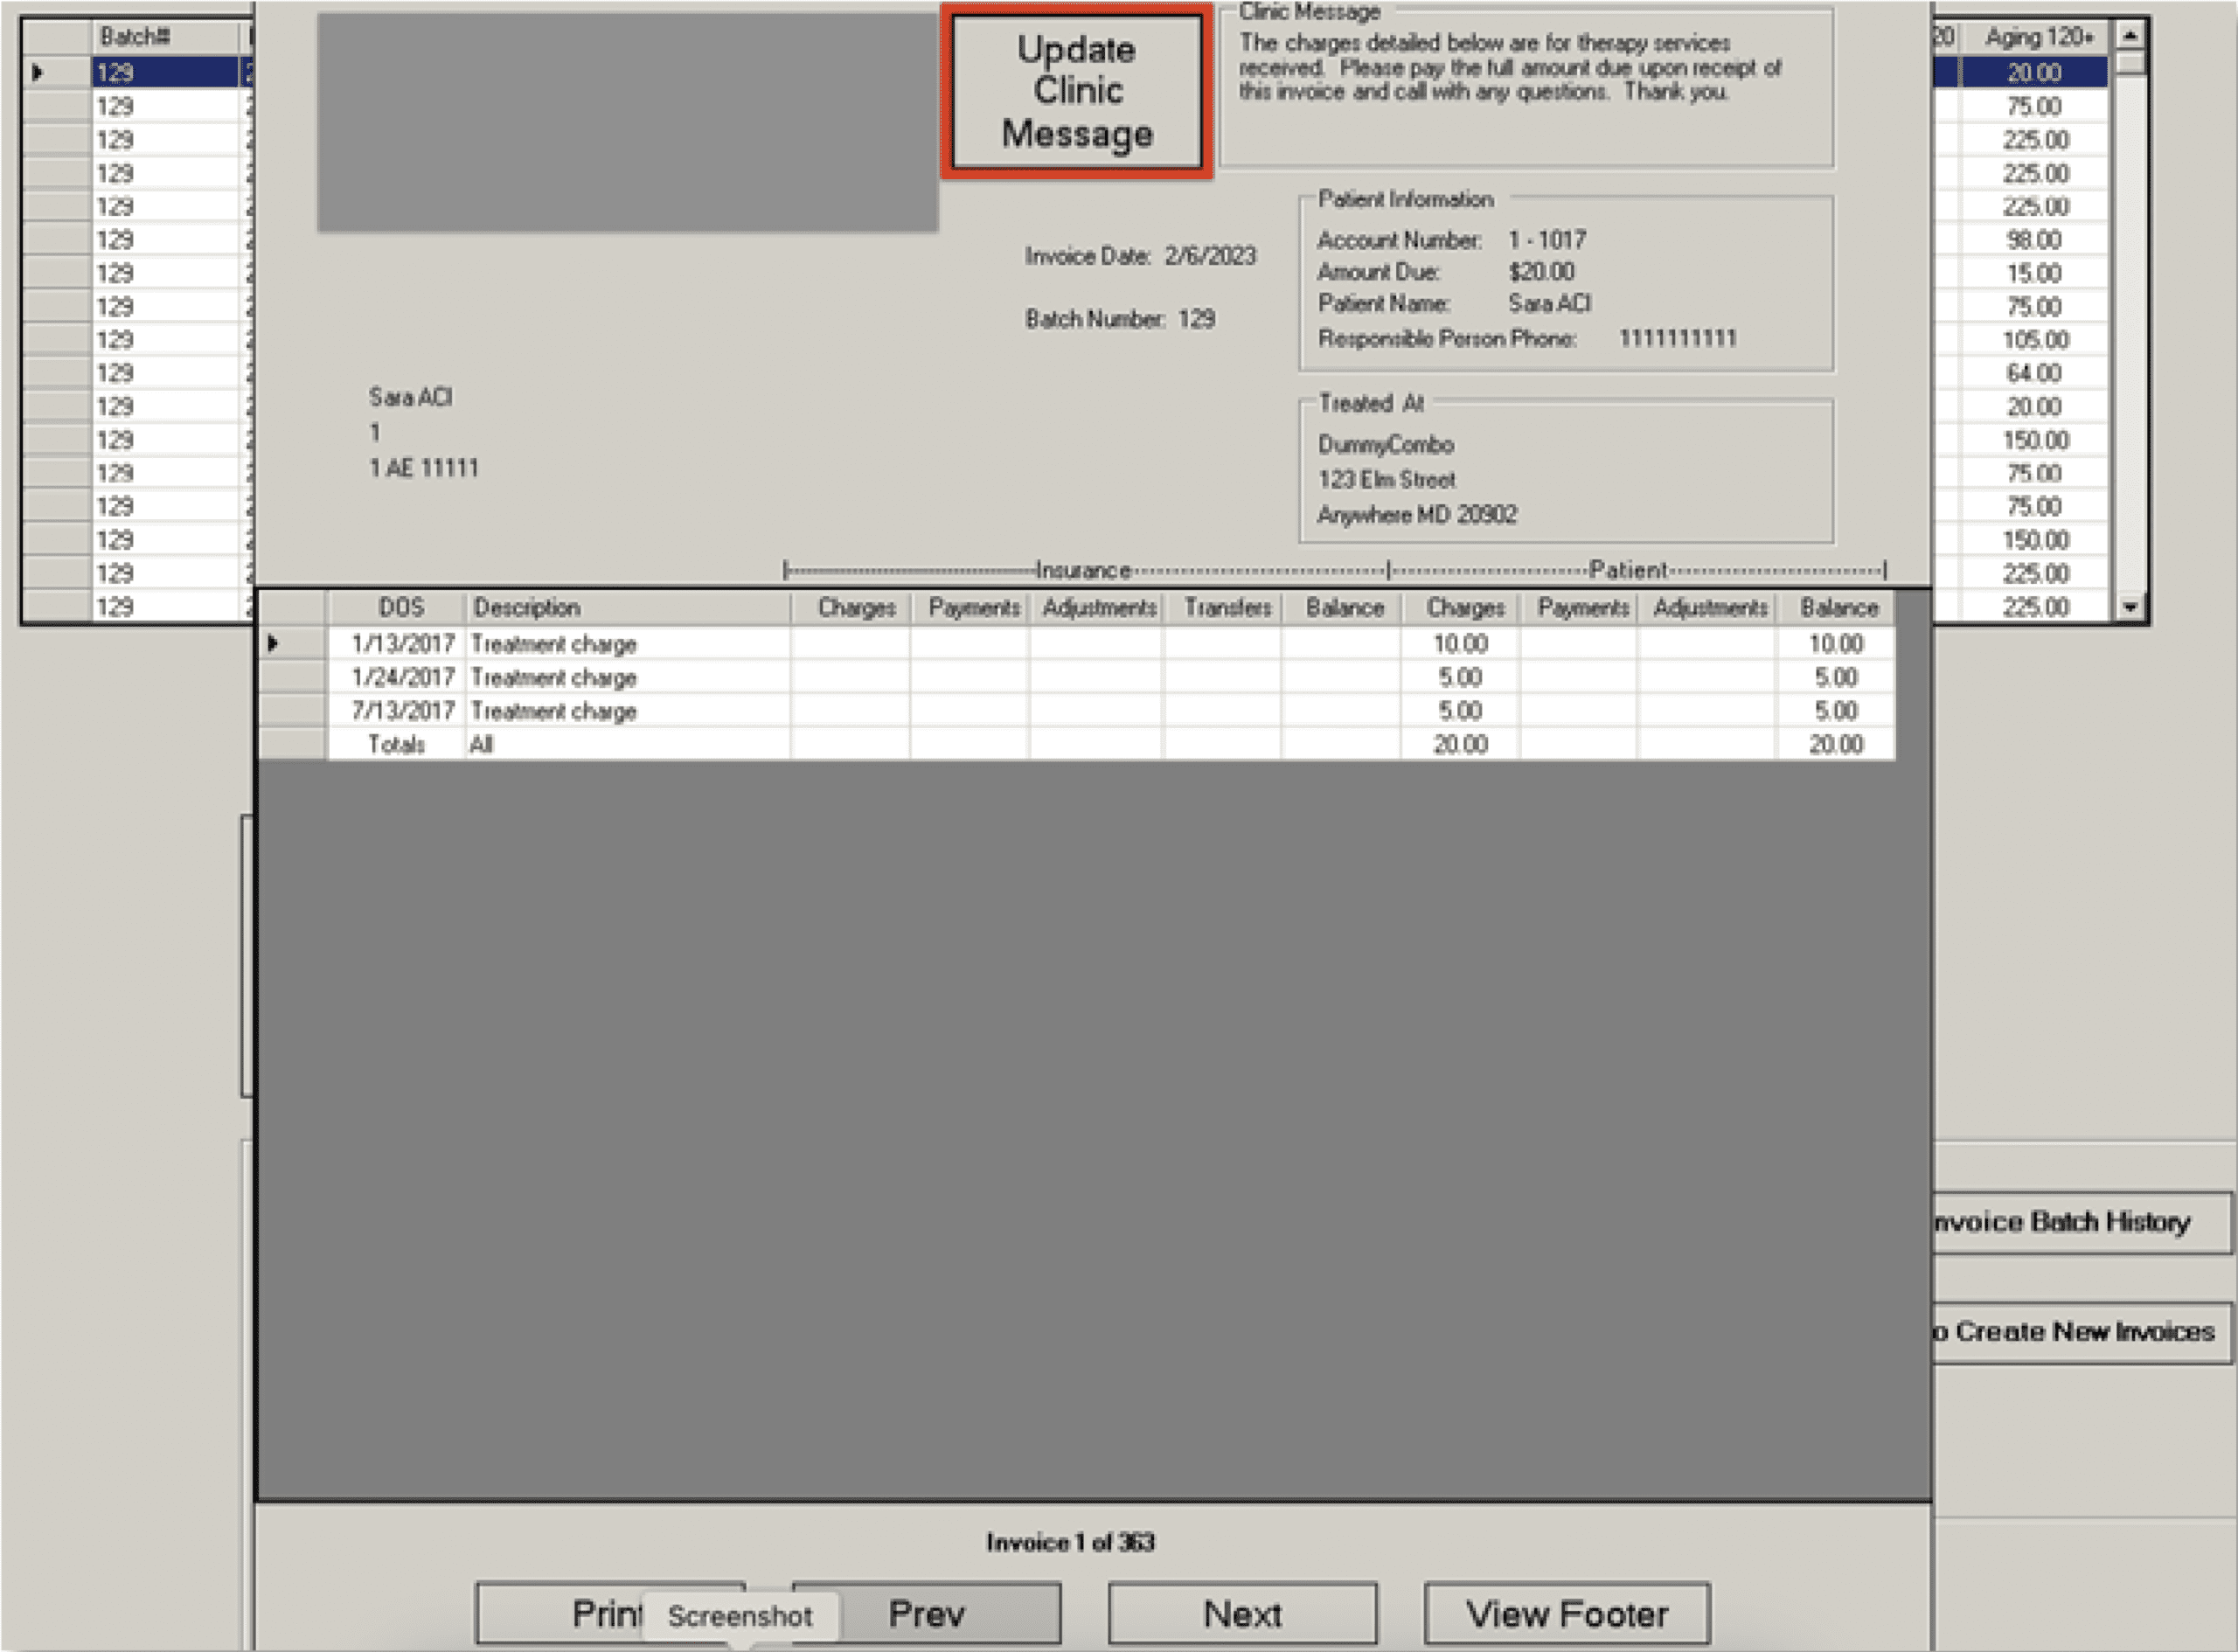
From this screen, you can create or edit the text of your Clinic Message that appears on every invoice. Your default message is an opportunity to thank the patient for choosing your clinic and advise them that payment is due upon receipt of the invoice.
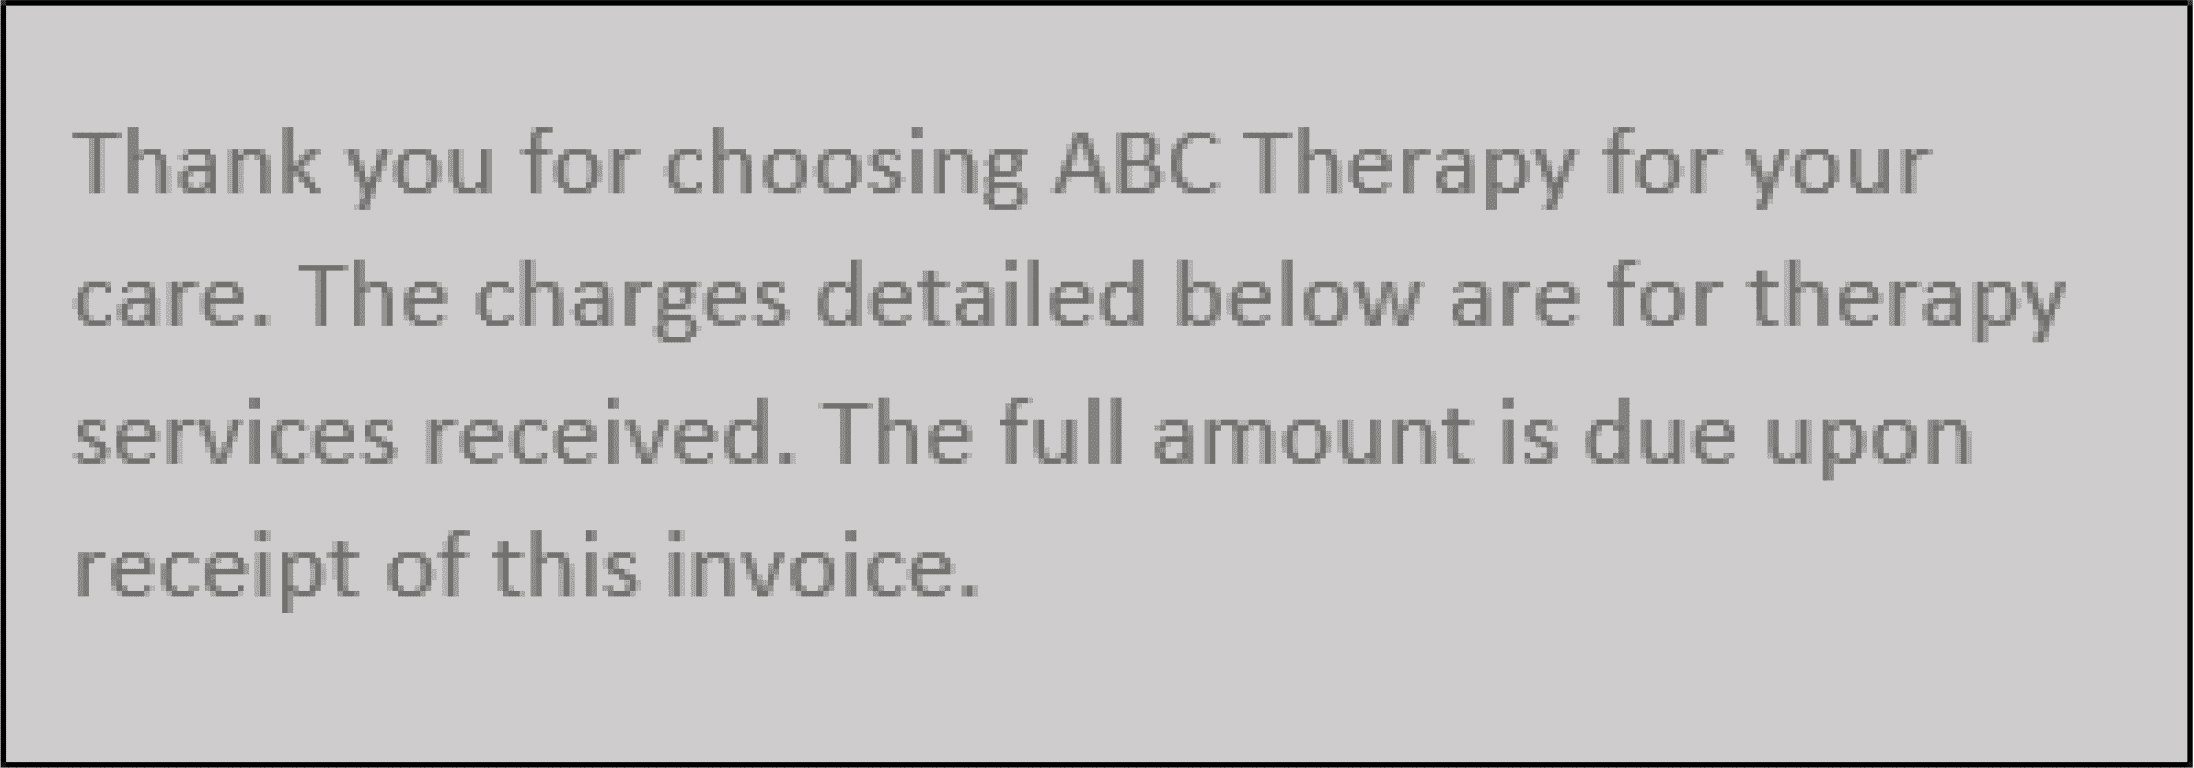
You will be able to modify this message on individual invoices, as needed when outstanding charges are moving through the collection cycle.
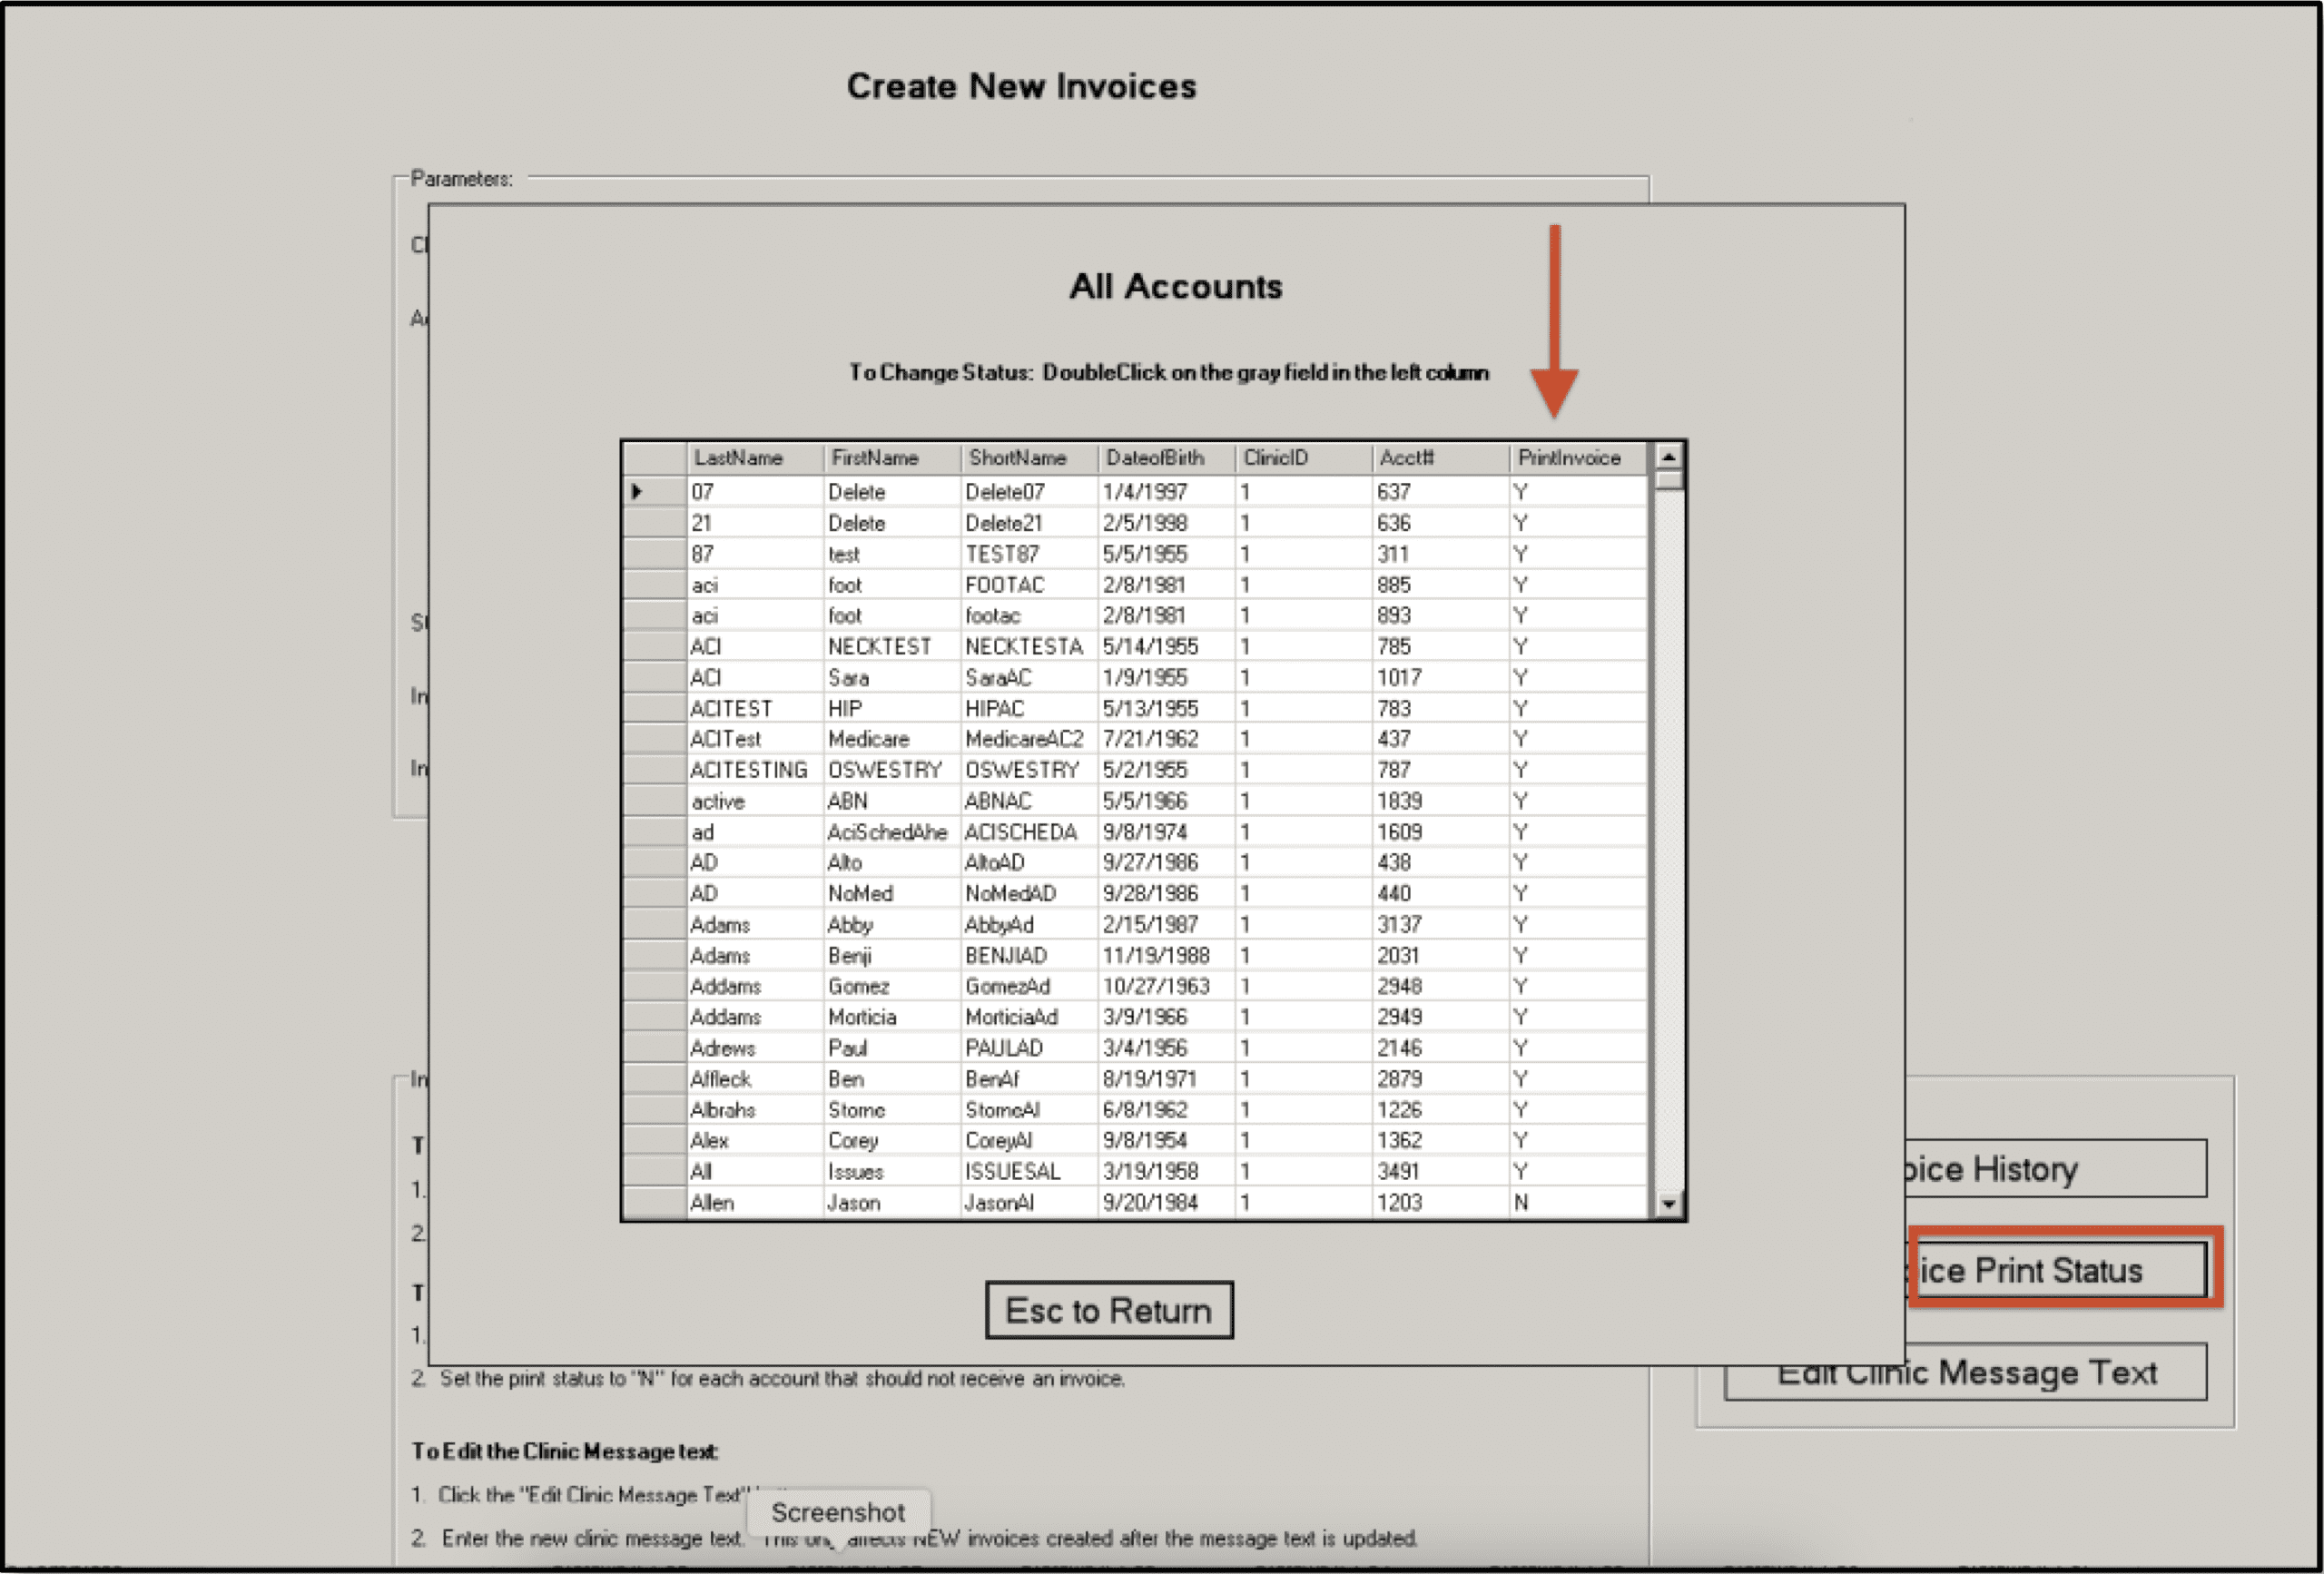
If you have any accounts that you do not want to print and send an invoice to, you can change the print status by selecting the “Edit Invoice Print Status” button. A list of all patients will appear, and you can change Print Status to “N” for the appropriate accounts. However, if you chose to suppress print status, it will be your responsibility to change it back to “Y” if you desire to create an invoice for that patient at a later date. Be very careful that you aren’t assuming a patient is receiving an invoice and not paying it when in actuality, you have suppressed the printing and are not sending the invoice to the patient.
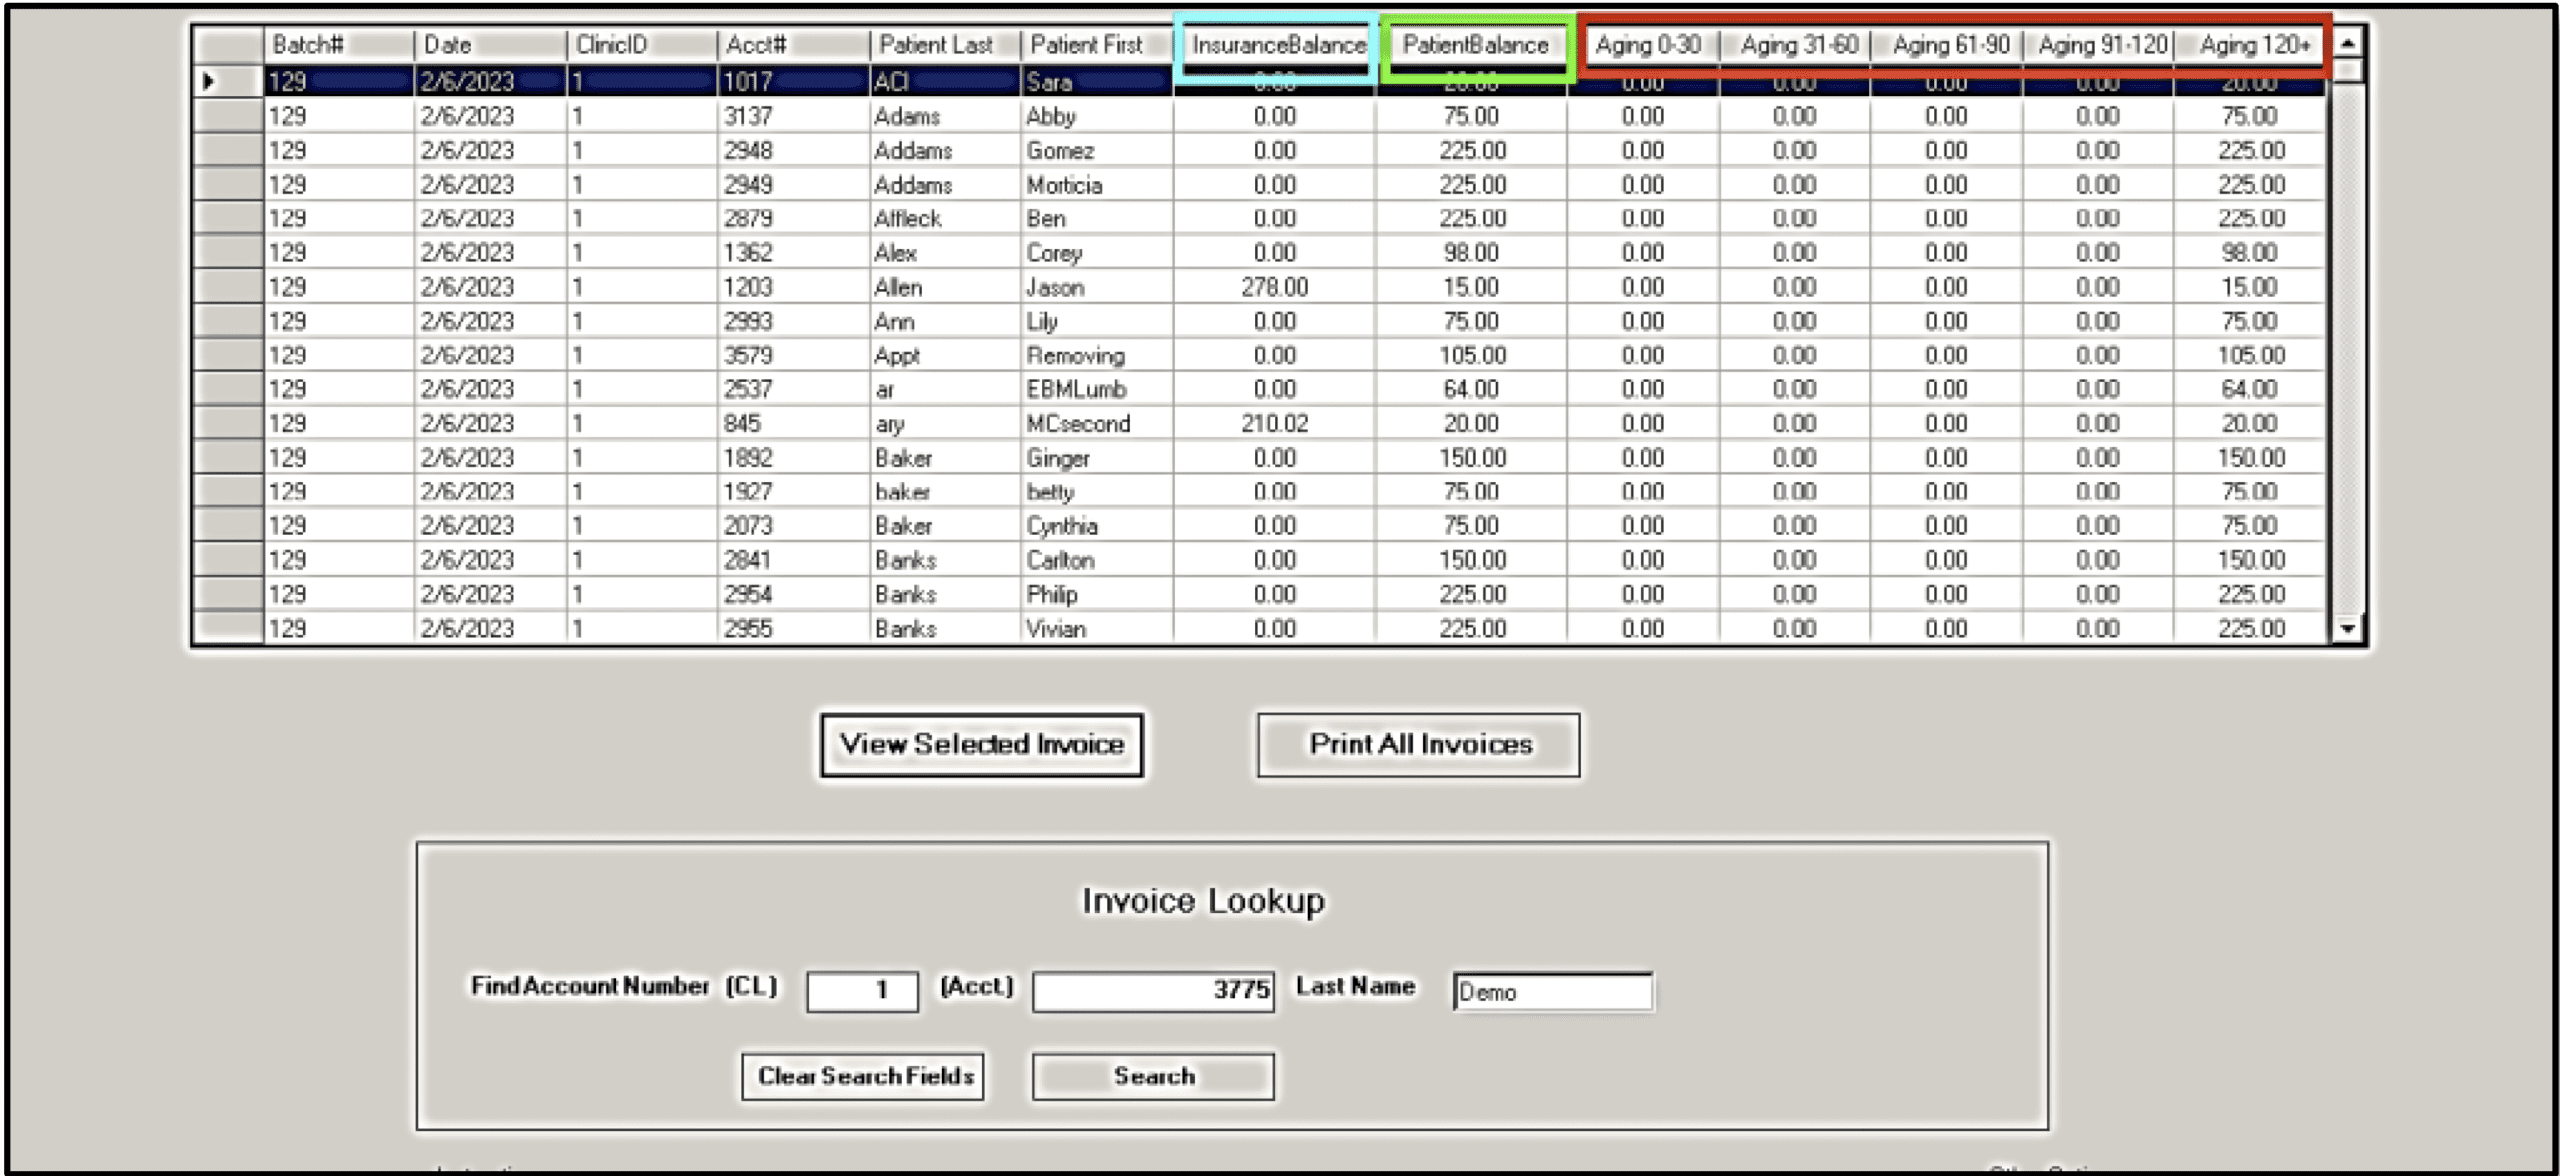
After you select “Create”, a list of the invoices to print will be displayed. You’ll notice that it has aging buckets like your Self-Pay Aging Report. It also displays Patient Balance and Insurance Balance.
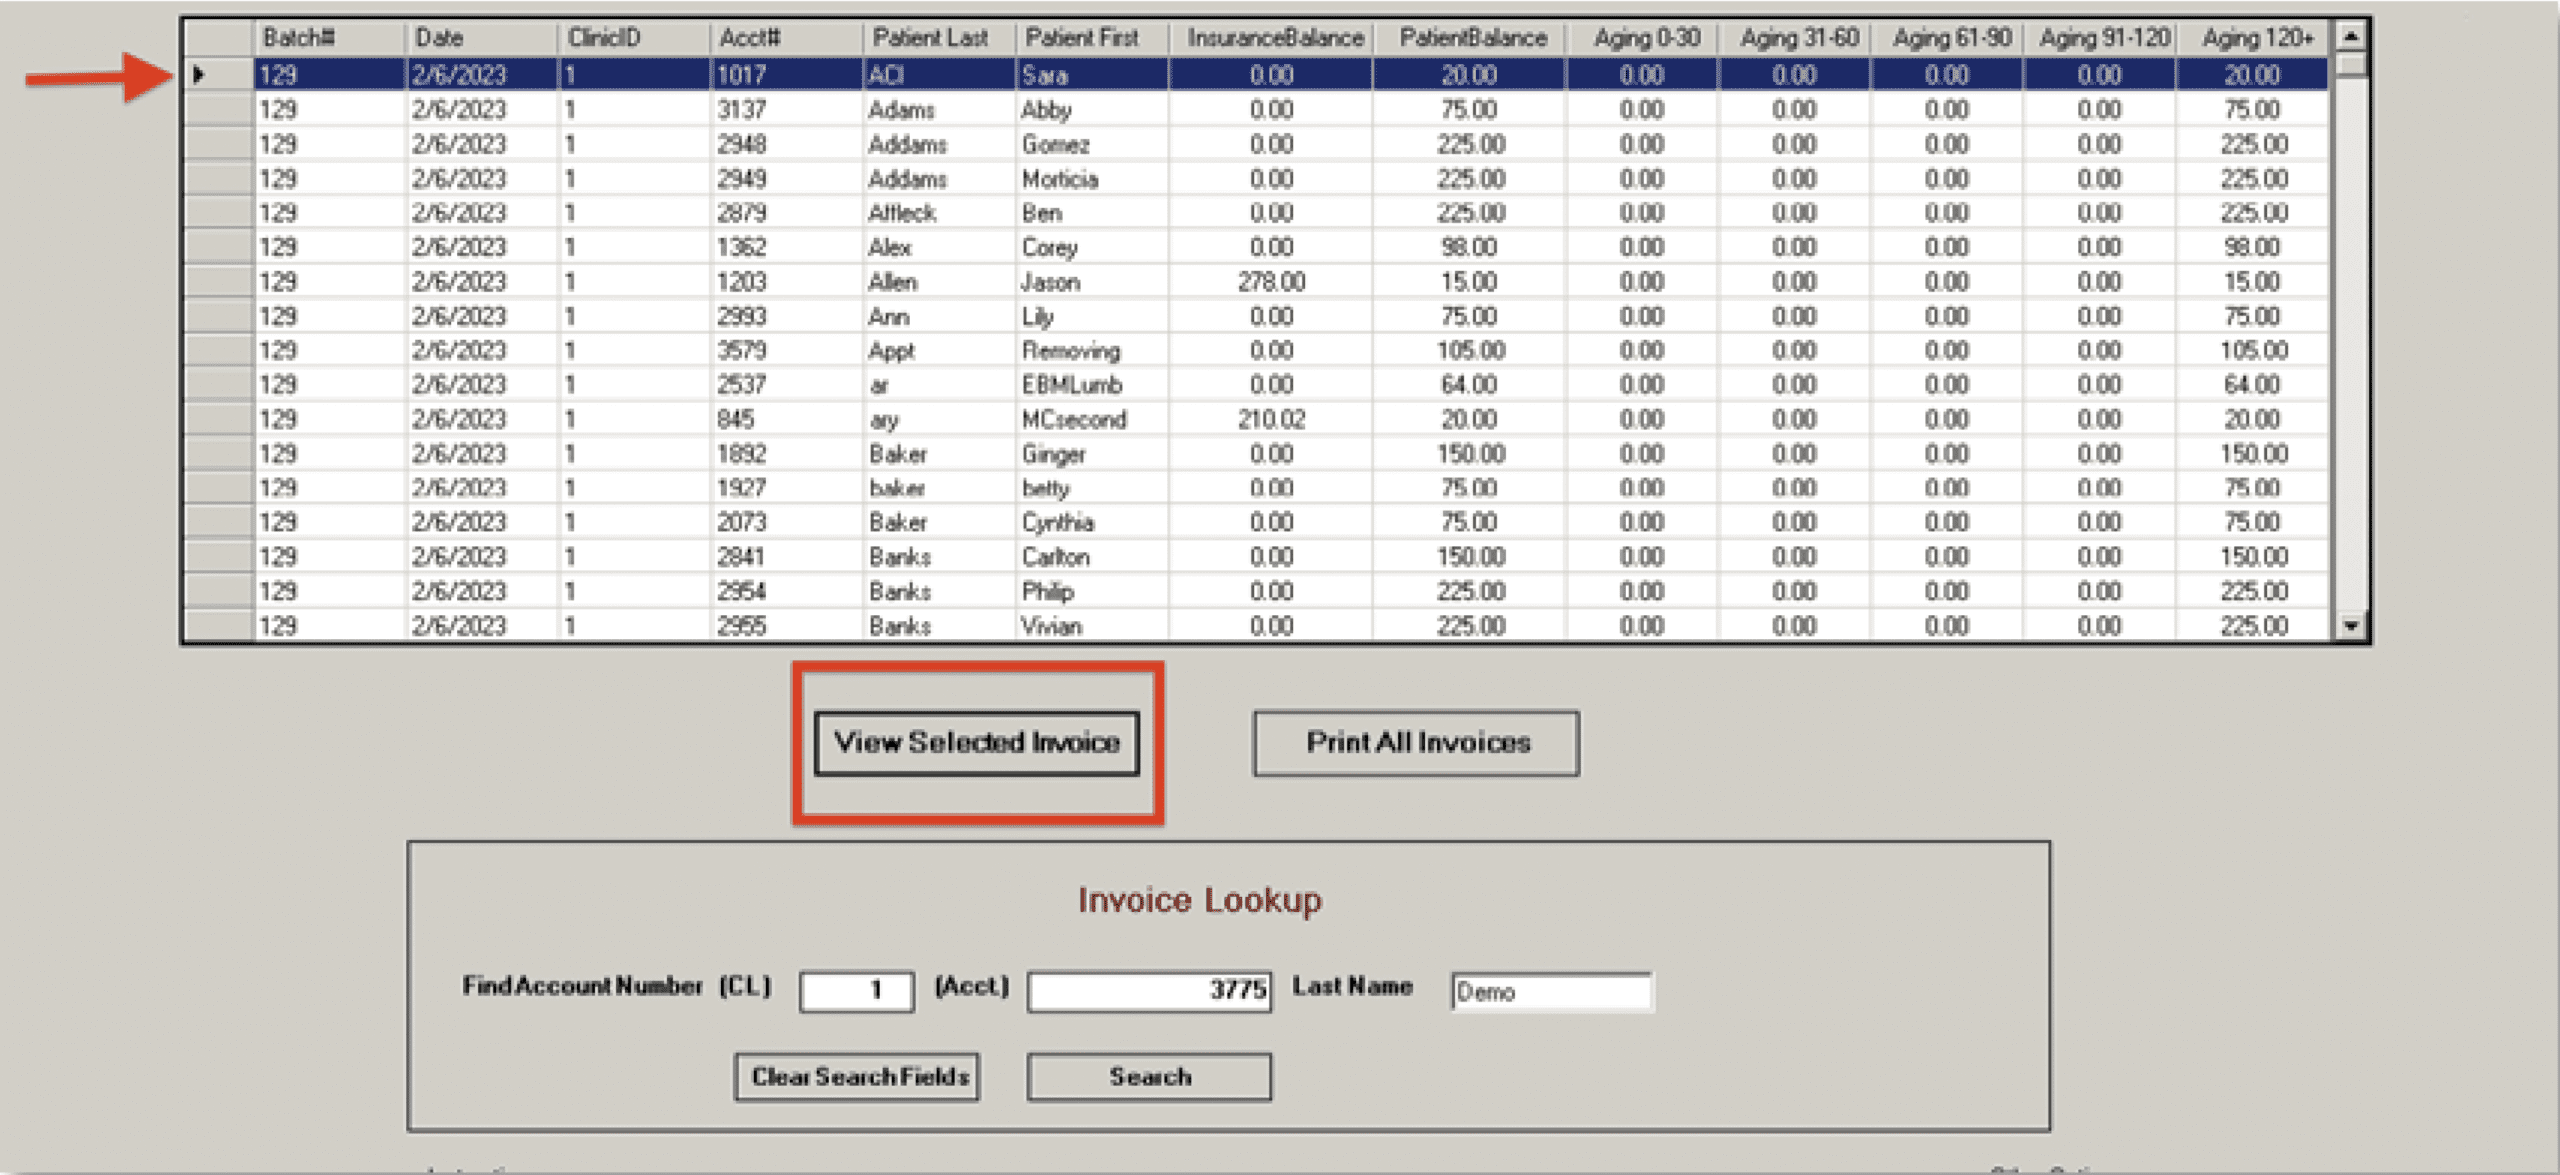
By the time you get to this point, you should have reviewed your self-pay balances, self-pay aging, and PAD reports and know what is going on with each account. You should know what stage of the collection process each account is at and be ready to change the Clinic Message text to the appropriate dunning notice. You can change this message by clicking on the row of the account you are interested in, selecting the “View Selected Invoice” button, and when the invoice appears on the screen, selecting the “Update Clinic Message” button. Type in your new message which will appear only on that account. The dunning process and suggested messages are covered in the next and last part of this series.

Once you are comfortable that you have made all the desired updates to the invoices, click “Print All Invoices” and the selected invoices will print and be ready for mailing.
You can see this process of reviewing, printing, and mailing invoices is cumbersome, time-consuming, and expensive. This is why you want to collect as much as possible from the patient at the time of service. This includes co-pays, self-pay, deductibles, and coinsurance.
Invoices
These are more detailed and usually only necessary for legal cases and by request from patients for their HSAs or taxes. To create a detailed invoice, select “Invoice” from the Corporate Reports Menu. Before opening this screen, make sure you know the account number for the account whose detailed invoice you want to print. You won’t be making any customizations of these reports. Follow the steps below.
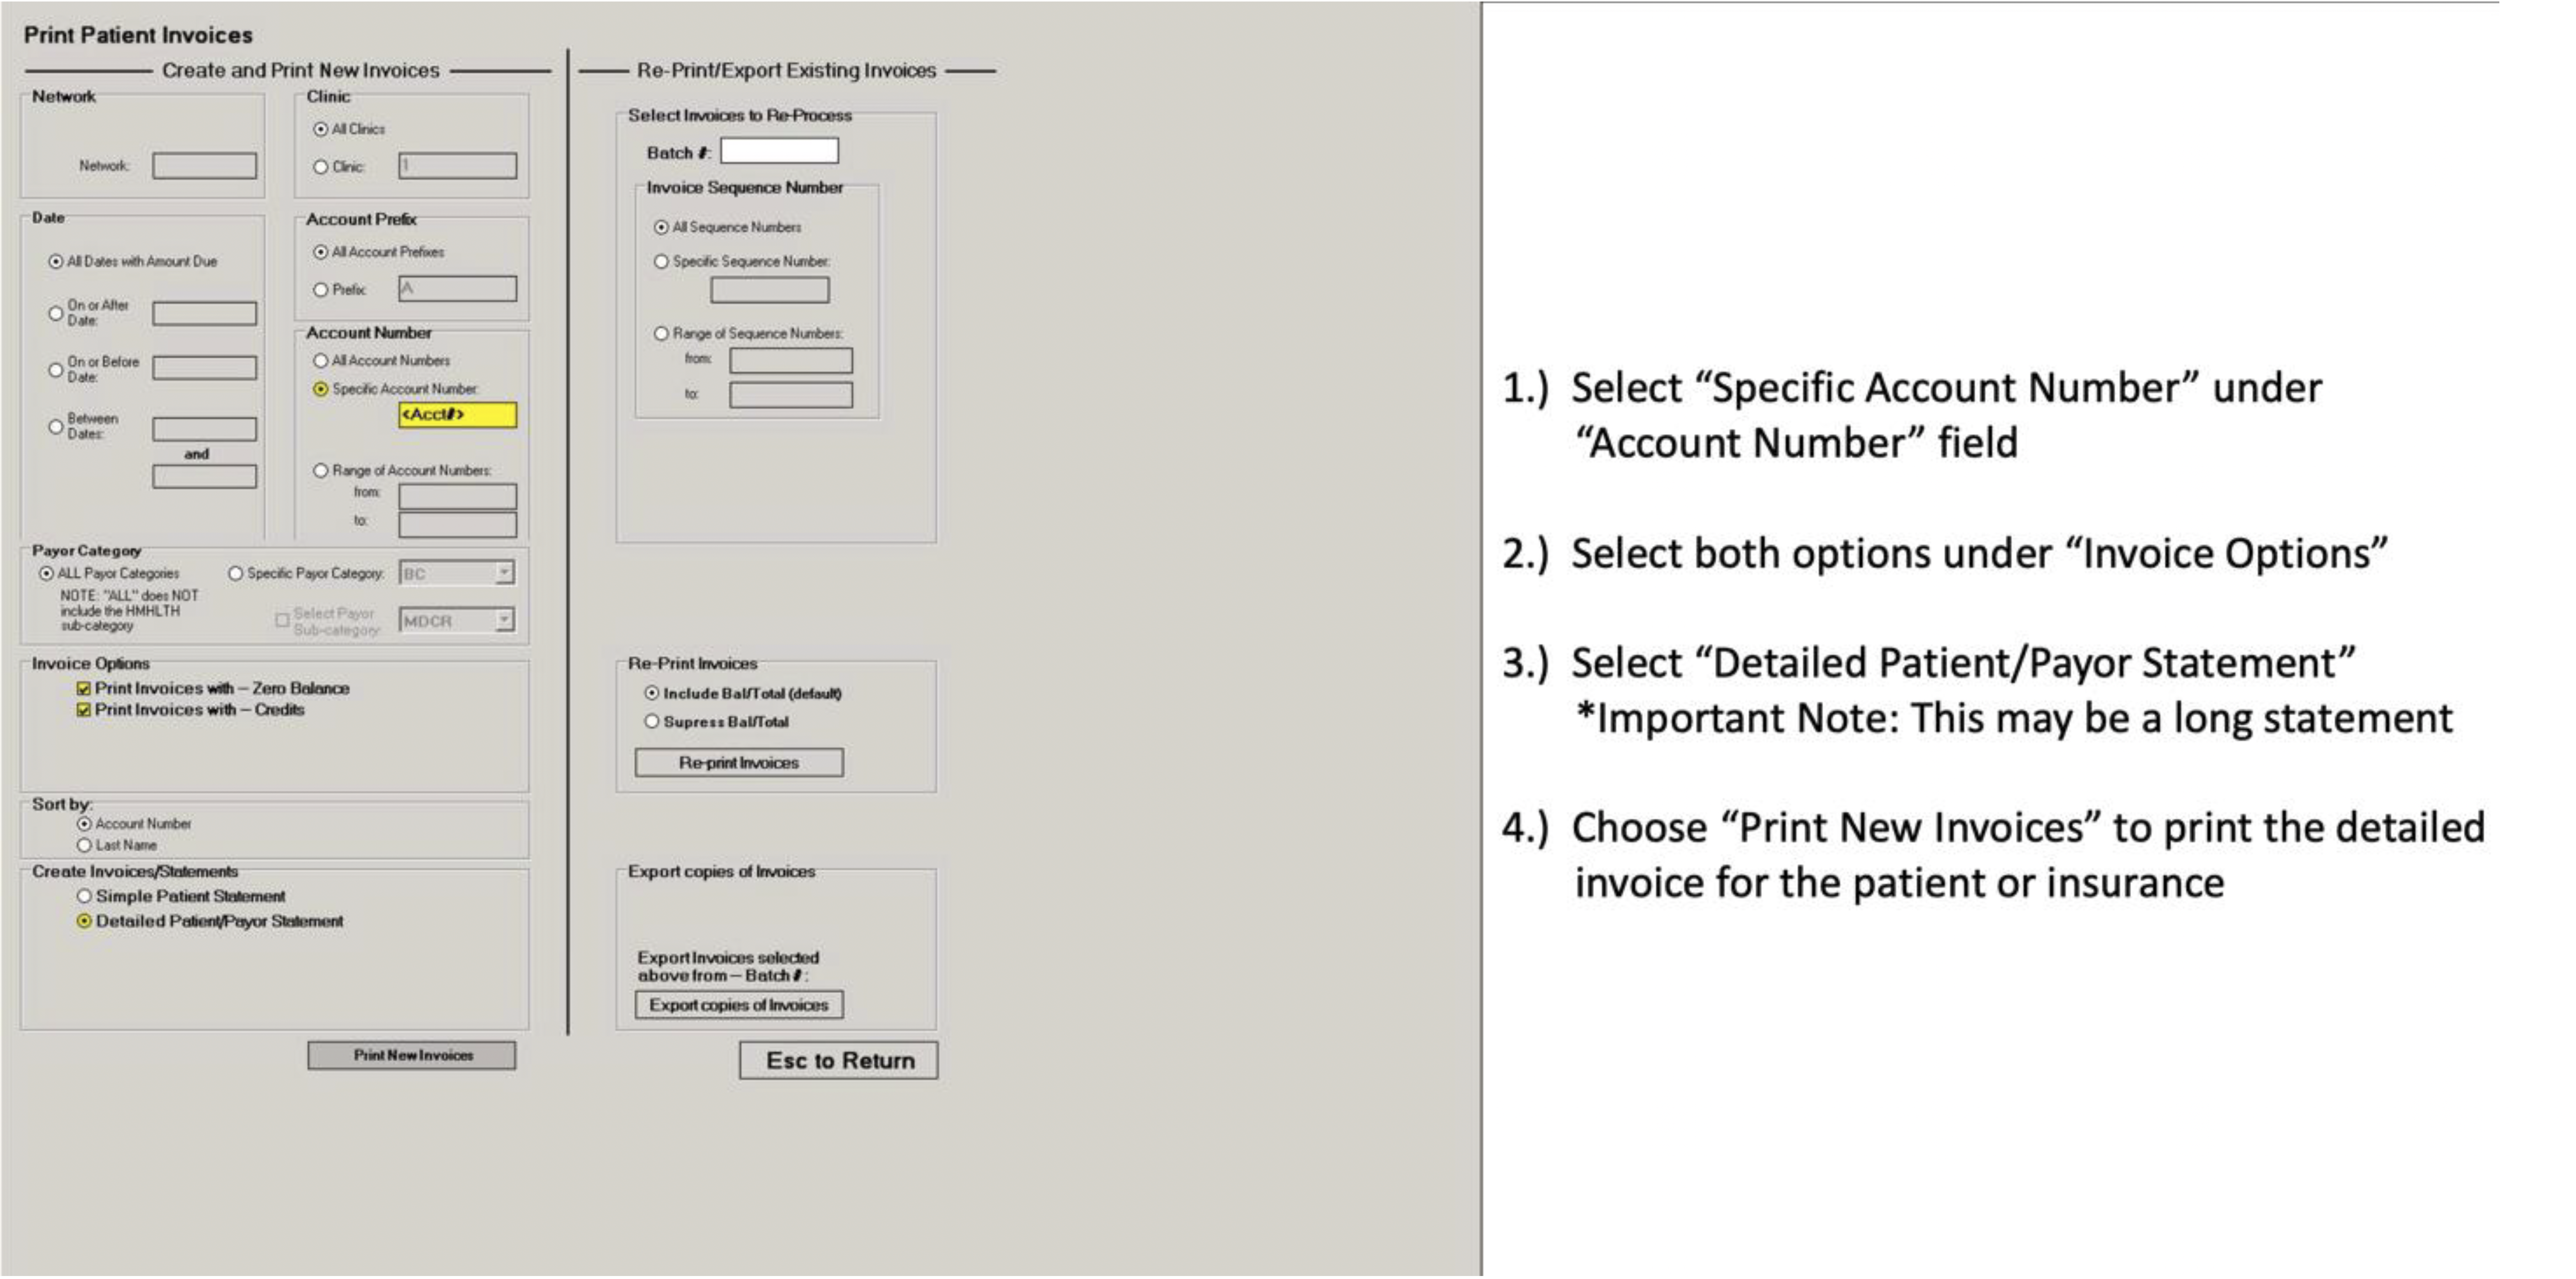
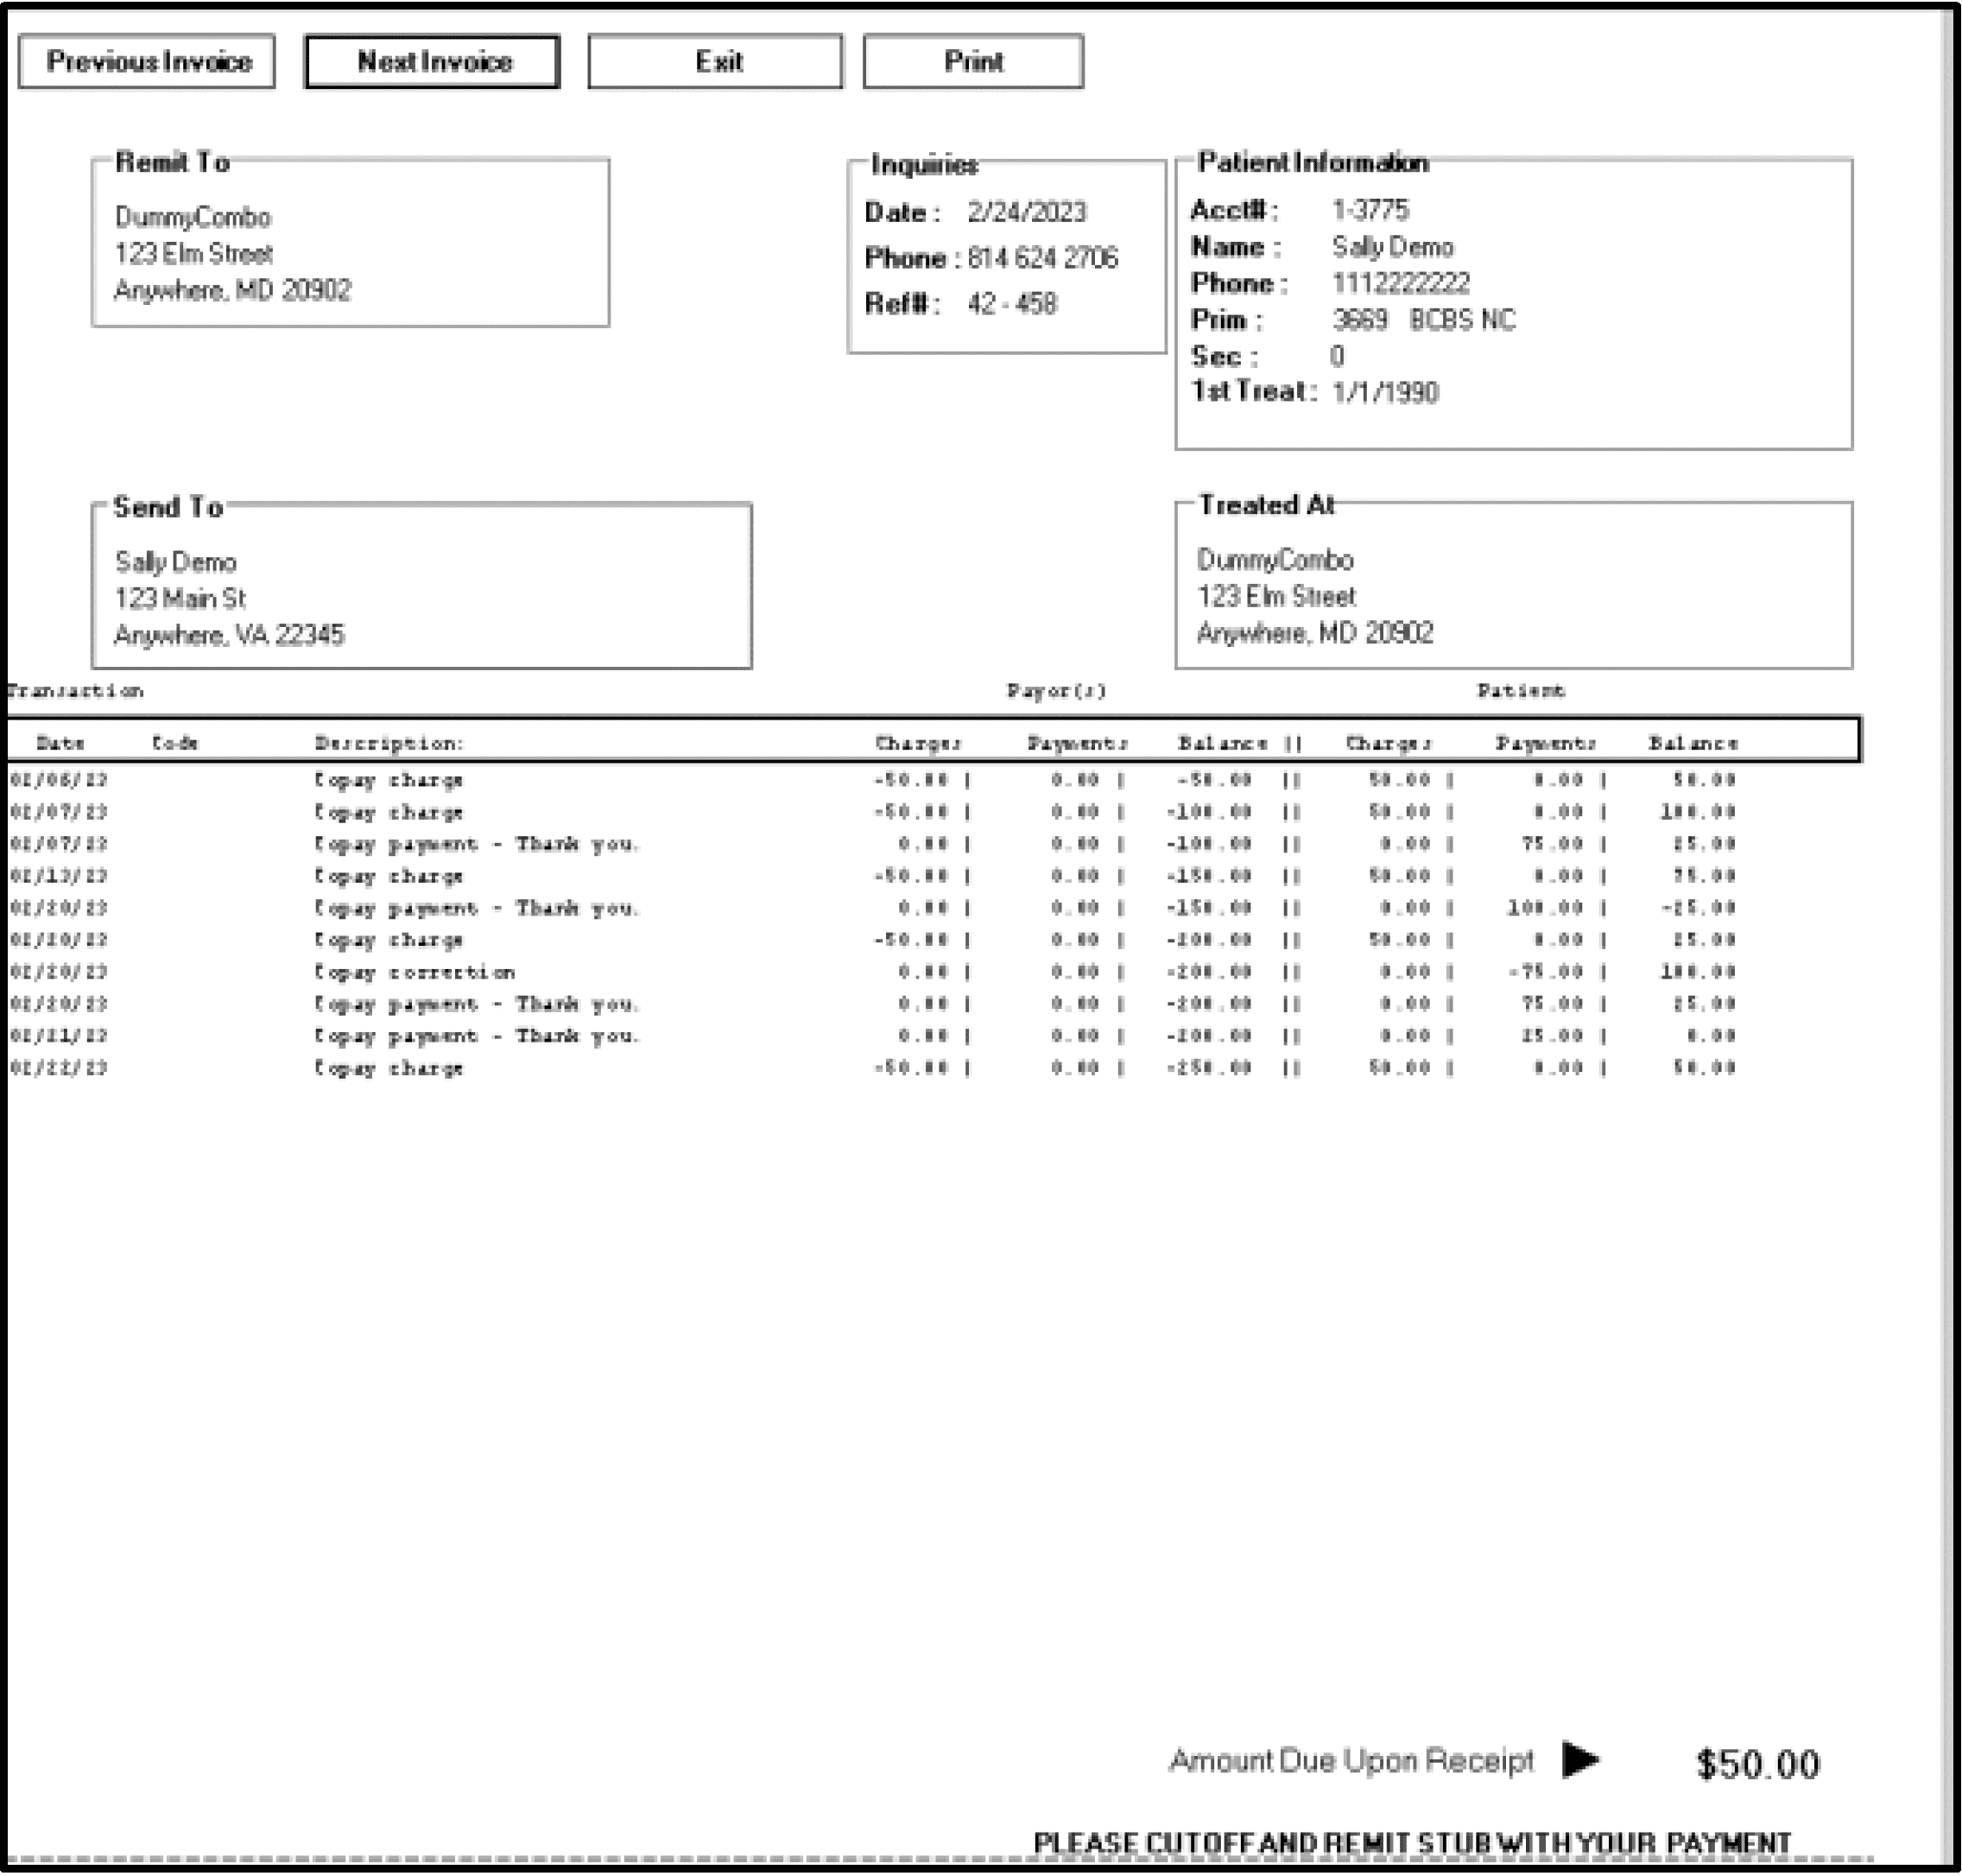
If you would like a copy of this guide to download for your own personal reference, please use the download button below to obtain a copy in PDF format. Check back for more Systems4PT guides and updates!
At Systems4PT we provide an ALL USA BASED team that gets you PAID MORE, PAID FASTER, that COSTS LESS, and we only get paid AFTER you get paid!
More Articles by Systems4PT
Busting PT Myths: “Physical Therapy is Just Exercise”
Busting PT Myths: "Physical Therapy is...
Busting PT Myths – Physical Therapy Is Only for Recovery
Busting PT Myths "Physical Therapy is...
Busting PT Myths – Physical Therapy Is Too Time Consuming
Busting PT Myths "Is Physical Therapy Too...


